Quinoa Stuffed Bell Peppers (Vegetarian)
15m easy
gluten-free vegetarian
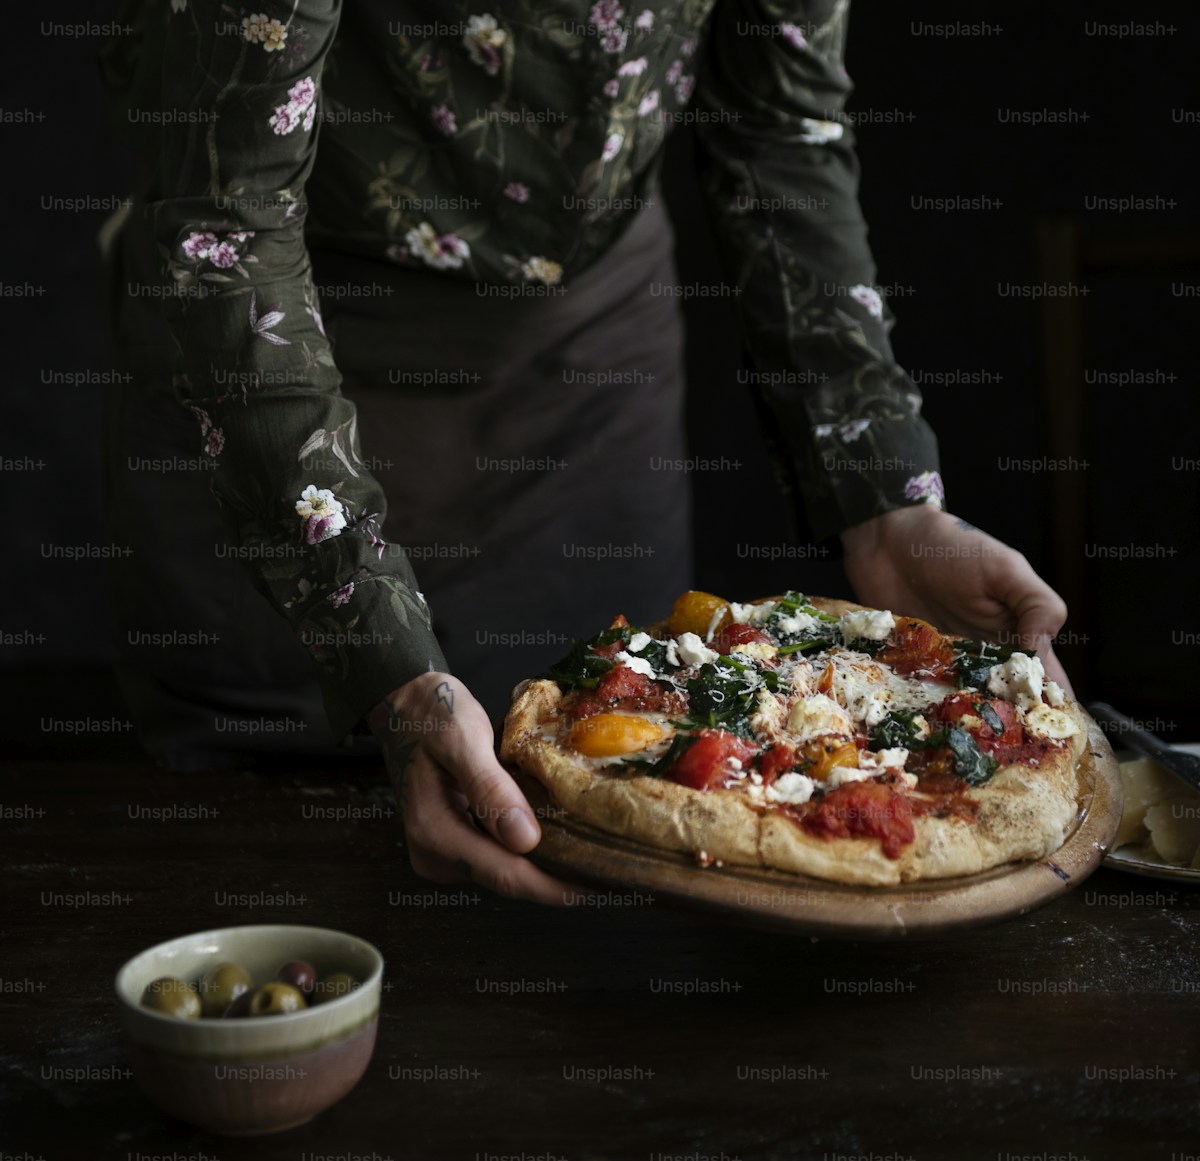
A crispy, grain-free pizza crust made from soaked and blended quinoa. Naturally gluten-free with a golden exterior and chewy center. Top however you like.
This quinoa pizza crust is one of those recipes that sounds like it should not work but genuinely does. Raw quinoa, soaked overnight and blended with a few pantry staples, produces a batter that bakes into a crispy, golden crust that holds toppings without falling apart. It is not trying to be regular pizza dough — it has its own character, somewhere between a thin cracker crust and a socca flatbread, with a slightly nutty flavor that works beautifully with both classic and creative toppings.
This recipe requires planning ahead because the quinoa needs to soak for at least 6 hours, ideally overnight. Soaking does two essential things. First, it softens the grains enough that a standard blender can break them down into a smooth batter. Unsoaked quinoa will leave gritty particles no matter how long you blend, and those particles create weak spots in the crust. Second, soaking activates some of the quinoa’s natural starches, which act as a binder when the batter bakes. This is what holds the crust together without eggs or flour.
Start the soak before bed and the quinoa will be ready in the morning. Or start it before work and make pizza for dinner. The soaked, drained quinoa can also sit in the fridge for up to 24 hours if your plans change.
A high-speed blender produces the smoothest results, but a regular blender or food processor will work if you blend longer and stop to scrape down the sides frequently. You are looking for a batter with no visible grain fragments — completely smooth, like thick pancake batter. This usually takes 2 to 3 minutes of continuous blending.
The water amount may need slight adjustment depending on how much moisture your quinoa retained after draining. Start with a quarter cup and add more only if the blender is struggling. Too much water makes the batter thin and the crust will be flimsy. Too little and it will not spread on the pan.
The baking powder is what gives the crust a slight lift and chewiness in the center while the edges crisp up. Without it, the crust would be dense and flat like a cracker. It is a small amount but makes a meaningful difference in texture.
Two details matter for a crispy crust. First, generously oil the parchment paper. The oil fries the bottom of the crust as it bakes, creating a golden, crunchy base layer. Second, bake on the bottom rack of the oven. Bottom heat drives moisture out of the crust faster, which prevents sogginess.
Spreading the batter thin is important. A thick crust will be soft in the middle and will not support toppings well. Aim for about an eighth of an inch thick — thin enough to see the parchment through the batter in spots is actually fine. It will puff up slightly during baking.
The flip is the trickiest part. After 15 minutes, the crust should be firm enough to handle. Slide the parchment onto a cutting board, place a second baking sheet on top, and flip the whole assembly. Peel off the original parchment and the golden-brown bottom is now facing up. This step is optional — you can skip the flip and just add toppings to the top surface — but flipping gives you a crispier result on both sides.
Less is more with this crust. It is sturdy enough to hold a reasonable amount of toppings, but overloading it will make the center soggy. A thin layer of marinara, a moderate amount of cheese, and one or two additional toppings is the sweet spot.
Classic margherita: Marinara, fresh mozzarella slices, and basil leaves added after baking. Simple and shows off the crust.
Mediterranean: Olive tapenade instead of marinara, crumbled feta, sun-dried tomatoes, and arugula tossed on after baking. Pairs well with our lemon herb quinoa salad on the side.
BBQ chicken: Barbecue sauce base, shredded chicken, red onion, and smoked gouda. The sweetness of the sauce works well against the nutty crust.
Vegan: Use dairy-free mozzarella and load up with roasted vegetables — bell peppers, mushrooms, and artichoke hearts. A drizzle of balsamic glaze after baking ties everything together.
If you have tried quinoa pizza crust before and been disappointed, these adjustments usually fix the common problems. If the crust was gritty, soak longer and blend longer. If it was too soft, spread it thinner and make sure your oven is fully preheated. If it fell apart, make sure you used baking powder and enough oil on the parchment.
For more ideas using quinoa in unexpected ways, check out our quinoa flour guide which covers grinding your own quinoa flour for baking projects beyond pizza.
If you enjoy quinoa in Italian-inspired dishes, our mushroom spinach quinoa risotto uses a similarly creamy, oven-friendly approach.
The baked crust (without toppings) can be made ahead and stored in the fridge for up to 3 days or frozen for up to 2 months. Wrap tightly in plastic wrap or store in a freezer bag. When ready to use, add toppings and bake at 425 degrees for 8 to 10 minutes. Pre-baked crusts make weeknight pizza nights almost instant.
Soak the raw quinoa in water for at least 6 hours or overnight. This step is critical — unsoaked quinoa will not blend smoothly and the crust will be gritty. After soaking, drain and rinse the quinoa thoroughly in a fine-mesh strainer.
Preheat the oven to 425 degrees Fahrenheit. Line a large baking sheet with parchment paper and brush it generously with olive oil.
Add the soaked and drained quinoa, water, olive oil, baking powder, salt, garlic powder, and oregano to a high-speed blender or food processor. Blend on high for 2 to 3 minutes until completely smooth, stopping to scrape down the sides as needed. The batter should have the consistency of a thick pancake batter. If it is too thick, add water one tablespoon at a time.
Pour the batter onto the prepared baking sheet and spread it into a thin, even circle about 10 to 12 inches in diameter. Use the back of a spoon or an offset spatula to smooth it out. The thinner you spread it, the crispier the crust will be.
Bake the crust on the bottom rack for 15 minutes until the edges are golden and the surface is dry to the touch. Carefully flip the crust using the parchment paper and a second baking sheet. Remove the top parchment, add your sauce, cheese, and toppings, and return to the oven for another 8 to 10 minutes until the cheese is melted and bubbly and the crust is crispy.
Join 1,000+ home cooks who get weekly quinoa recipes and tips.
No spam. Unsubscribe anytime.